 Kula Journal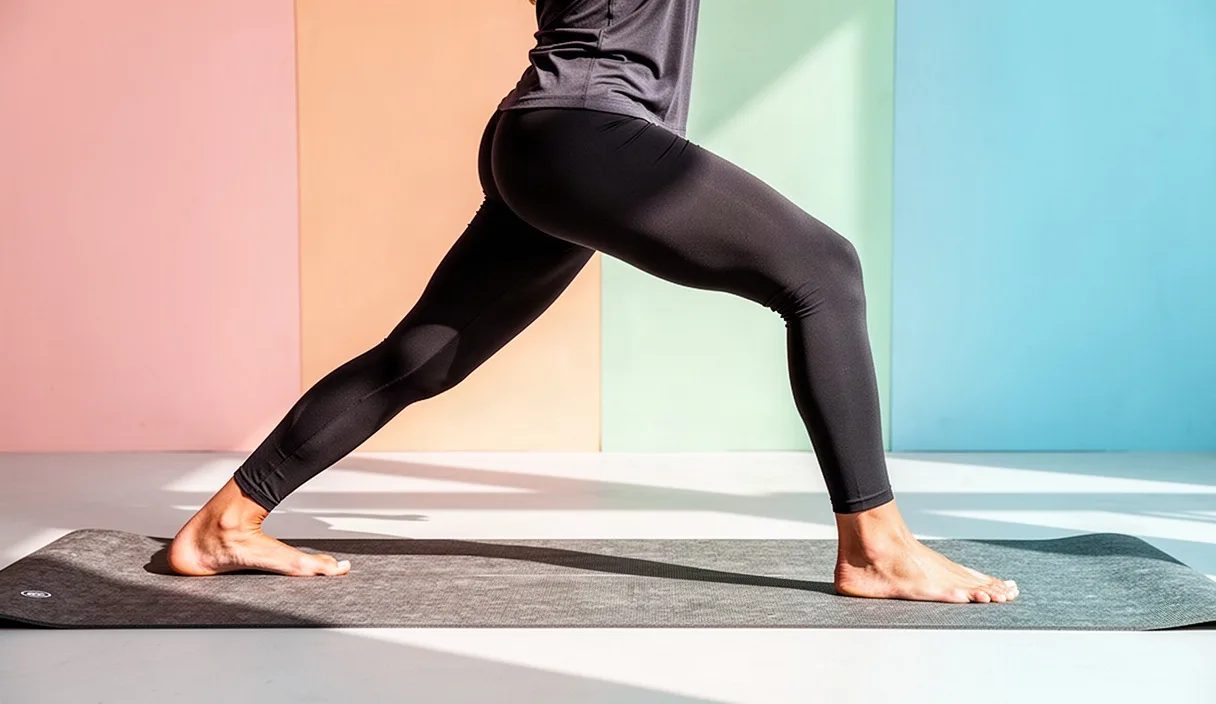

Warrior Two is a standing yoga posture. You place your feet wide, turn the front foot out by 90 degrees, keep the back leg straight, and bend the front knee over the ankle. Yoga teachers often tell students to square their hips to the long edge of the mat. For practitioners with stiff hips, this instruction creates sharp pinching in the front groin or a persistent ache across the sacroiliac joints.
Stiffness in this posture does not always come from short muscles. Bone structure sets the hard limit for how far a hip can turn out or move sideways. When you force your pelvis to mimic a flat shape from a textbook, your joints absorb forces they were not built to handle. Adjusting your stance based on your skeletal anatomy keeps the posture stable, protects your joints, and reduces strain.
Hip socket variation and acetabulum depth
The hip joint is a ball-and-socket mechanism. The acetabulum is the cup-shaped socket in the pelvis. The femoral head is the round top of the thigh bone that sits inside this cup. No two human skeletons share identical hip sockets. The depth of your acetabulum and the angle at which it faces determine your natural range of motion in Warrior Two.
Some people have deep hip sockets, known clinically as coxa profunda. In a deep socket, the bony rim covers more of the femoral head. This provides joint stability, but it limits the angle of abduction, which is the movement of the leg away from the midline of the body. Other people have shallow sockets that allow wide leg spreads but provide less passive bony support. If you have deep sockets, no amount of stretching will allow you to spread your legs into a flat line without pinching the front rim of the hip.
The angle of the femoral neck relative to the femoral shaft also dictates motion. This is called the angle of version. An anteverted femur angles forward, which favors internal rotation. A retroverted femur angles backward, which favors external rotation. In a standard Warrior Two, the front hip requires significant external rotation and abduction. A person with anteverted hips will experience bone-on-bone contact between the femoral neck and the acetabular rim much earlier than a person with retroverted hips.
| Anatomical Trait | Mechanical Effect in Warrior Two | Recommended Adjustment |
|---|---|---|
| Deep acetabulum (coxa profunda) | Femur strikes acetabular rim early during wide abduction. | Shorten stance length by 4 to 8 inches. |
| Shallow acetabulum | Wide abduction occurs without bony contact, but joint requires muscular support. | Maintain moderate stance; engage gluteus medius actively. |
| Femoral anteversion (forward tilt) | External rotation feels blocked; front knee collapses inward. | Turn pelvis 20 to 30 degrees toward the front foot. |
| Femoral retroversion (backward tilt) | External rotation occurs easily; hip abduction reaches 45 degrees or more. | Keep pelvis closer to the long mat edge without forcing flat alignment. |
Distinguishing between bone contact and muscle tension is straightforward. Muscle tension feels like a dull, pulling sensation across the belly of the inner thigh or hamstring. Bony impingement feels like an abrupt stop, often accompanied by a pinch in the front crease of the hip. If you feel a pinch, back out of the range immediately. Pushing through a bony stop irritates the labrum, which is the ring of cartilage sealing the socket.
The risk of forcing the front knee toward the pinky toe
A frequent cue in yoga classes is to press the front knee outward toward the pinky toe side of the foot. Teachers offer this cue to prevent the knee from caving inward. When your pelvis is forced to stay parallel to the long edge of the mat, your hip reaches its maximum external rotation quickly. If your hip stops turning and you continue pushing your knee outward, the rotation transfers directly down into the knee joint.
The knee is a hinge joint designed primarily to bend and straighten in one plane. It permits only minimal rotation when bent at 90 degrees. Forcing the knee wide against a locked hip places torsional stress on the medial collateral ligament on the inner knee and compresses the lateral meniscus on the outer knee. Over months of practice, this rotational torque degrades joint cartilage and strains tendons.
To protect the knee, your pelvis must move with the thigh. The front knee must track directly over the second and third toes of the front foot. If the knee falls inward toward the big toe, do not simply push the knee back with muscular force from the lower leg. Instead, rotate the entire pelvis toward the front foot until the center of the kneecap aligns with the middle toes.
- Stand in your standard Warrior Two setup.
- Look straight down at your front patella (kneecap).
- Locate the second toe of your front foot.
- If the kneecap points inside the big toe, bring your back hip forward 10 to 20 degrees.
- Observe how the kneecap shifts over the middle toes without any twisting force in the shin.
Stance length adjustments for different femur lengths
Class instructions often tell students to separate their feet by four feet, or one leg-length. These rigid measurements ignore proportions. A person with long femurs relative to their torso experiences much greater lever forces through the pelvis than a person with short femurs. A stance that looks wide and stable on a shorter student can destabilize the pelvis of a taller student.
If your stance is too long for your hip mobility, your pelvis drops lower than your adductor muscles can tolerate. The adductor magnus and gracilis muscles tense up to protect against overstretching. This reflexive contraction pulls the front knee inward and tilts the pelvis forward, which puts shearing forces on the pubic symphysis at the front of the pelvis.
Shortening your stance by several inches reduces the mechanical lever arm acting on the hip joint. A shorter stance decreases the angle of abduction required to bring the front thigh parallel to the floor, allowing the pelvis to remain stable and level.
Width between the feet matters as much as length. The traditional cue directs the front heel to align with the back arch in a straight line. This tightrope alignment demands extreme hip mobility and challenges balance. Widening your base by shifting the front foot toward the outer edge of the mat creates a heel-to-heel or railroad track stance. Spacing the feet 3 to 5 inches apart widthwise gives the femoral head room to rotate freely inside the acetabulum without impinging on the pelvis.
Pelvic tilt options for lower back comfort
The position of your pelvis dictates the curvature of your lower back. The psoas and iliacus muscles connect the lower spine and pelvis to the lesser trochanter on the inside of the femur. When the back leg extends behind you in Warrior Two, tight hip flexors pull the top of the pelvis forward into an anterior tilt. An anterior tilt arches the lumbar spine and compresses the facet joints between the vertebrae.
Many practitioners try to fix this arch by aggressively tucking the tailbone underneath them, pulling the pelvis into a posterior tilt. If your hip flexors are restricted, forcing a posterior tilt while keeping the back leg straight pulls hard on the lumbar spine. This can cause muscle spasms across the quadratus lumborum and strain the sacroiliac joint on the back leg side.
Choose an adaptable pelvic position instead of a forced vertical alignment. Follow these adjustments for lower back relief:
- Allow the back hip to angle forward and turn down slightly. The pelvis does not need to be level with the ceiling or flat to the wall.
- Turn the back foot inward to an angle of 45 to 60 degrees instead of perpendicular to the mat edge. This internal angle frees the back hip joint and eases tension on the tensor fasciae latae and iliotibial band.
- Soften the back knee by a fraction of an inch if you feel pulling in the front of your back hip or pinching in the lumbar spine. A micro-bend in the joint releases tension on the rectus femoris muscle.
- Hinge the rib cage and torso slightly forward over the front thigh, around 5 to 10 degrees from vertical. This small forward tilt reduces the extension demand on the lumbar spine and keeps the back muscles relaxed.
Wall drills to test your true hip abduction
To set an effective stance on the mat, you must measure your hip abduction without the balance demands of standing. Use these two wall drills to find your natural range.
The supine wall straddle test
This drill measures passive hip abduction supported by the floor. It removes balance, ankle mobility, and weight-bearing pressure from the hip joint.
- Sit sideways against an unobstructed wall with your hip touching the baseboard.
- Swing your legs up the wall and lie flat on your back, bringing your sitting bones close to the baseboard.
- Let your legs slide open away from each other along the wall until they stop naturally.
- Keep your lower back flat on the floor; do not allow your pelvis to lift or arch aggressively.
- Observe the angle between your legs. If your legs separate to an angle under 70 degrees before you feel a stretch or a stop, your stance in Warrior Two must be narrow.
- Note the stopping sensation. If you feel tightness along the inner thigh muscles, gentle breathing will allow them to release over time. If you feel a hard block on the outside or inside of the hip joint, that is your skeletal end-range.
The standing back-to-wall calibration
This drill clarifies the natural pelvic rotation your body needs for safe knee tracking.
- Stand with your heels, buttocks, and upper back resting against a flat wall.
- Step your feet about 3 feet apart.
- Turn your right foot out 90 degrees so the outer edge of your shoe or foot runs parallel to the wall.
- Bend your right knee toward a right angle.
- Notice what your left hip does. To keep your right knee tracking over your second toe without pain, your left hip will naturally pull off the wall by 2 to 4 inches.
- Allow that left hip to stay off the wall. Do not force both buttock cheeks to stay pinned to the surface.
- Step away from the wall and reproduce that identical pelvic rotation on your mat.
Common mistakes
Practitioners trying to force their bodies into standard alignment often develop habits that increase injury risk. Watch for these structural faults:
- Collapsing the inner arch of the back foot: Turning the back foot parallel to the short mat edge often causes the ankle to roll inward, flattening the arch and straining the tibial nerve and posterior tibial tendon. Turn the back toes inward by 30 to 45 degrees to press firmly into the outer heel.
- Over-striding: Taking a stance wider than your hips can support forces the groin muscles to work at their extreme stretch limit, leading to adductor strains.
- Aggressive tailbone tucking: Forcing the pelvis underneath you to flatten the lower back compresses the front acetabular rim against the femoral head. Keep a small, natural curve in your lumbar spine.
- Torso twisting: Twisting your upper ribs back to face the long side of the mat while your pelvis faces forward creates shearing forces in the thoracic-lumbar junction. Let your shoulders follow the natural angle of your hips.
Practical next steps for your practice
Adjusting your Warrior Two requires deliberate experimentation. On your next visit to the mat, set up your pose starting from the feet rather than the upper body. Shorten your stance by 6 inches compared to what you normally use. Turn your back foot inward to a 45-degree angle. Let your pelvis turn toward the front corner of your mat by 20 degrees before you bend your front knee.
Check the sensations in your body. The front groin should feel clear of pinch points, the front knee should track directly over the center of the foot, and the lower back should feel broad and neutral. If you take public classes, tell your instructor that you are working with an angled pelvis to accommodate your hip structure. A knowledgeable teacher will support anatomical alignment over aesthetic symmetry.
If you experience sharp groin pain, deep hip clicks accompanied by pain, or persistent lower back aches that do not improve after adjusting your stance, stop practicing the pose. Consult a physical therapist or orthopedic specialist. A professional can assess your joint capsule laxity, acetabular coverage, and soft tissue health to give you specific parameters for your movement practice.