 Kula Journal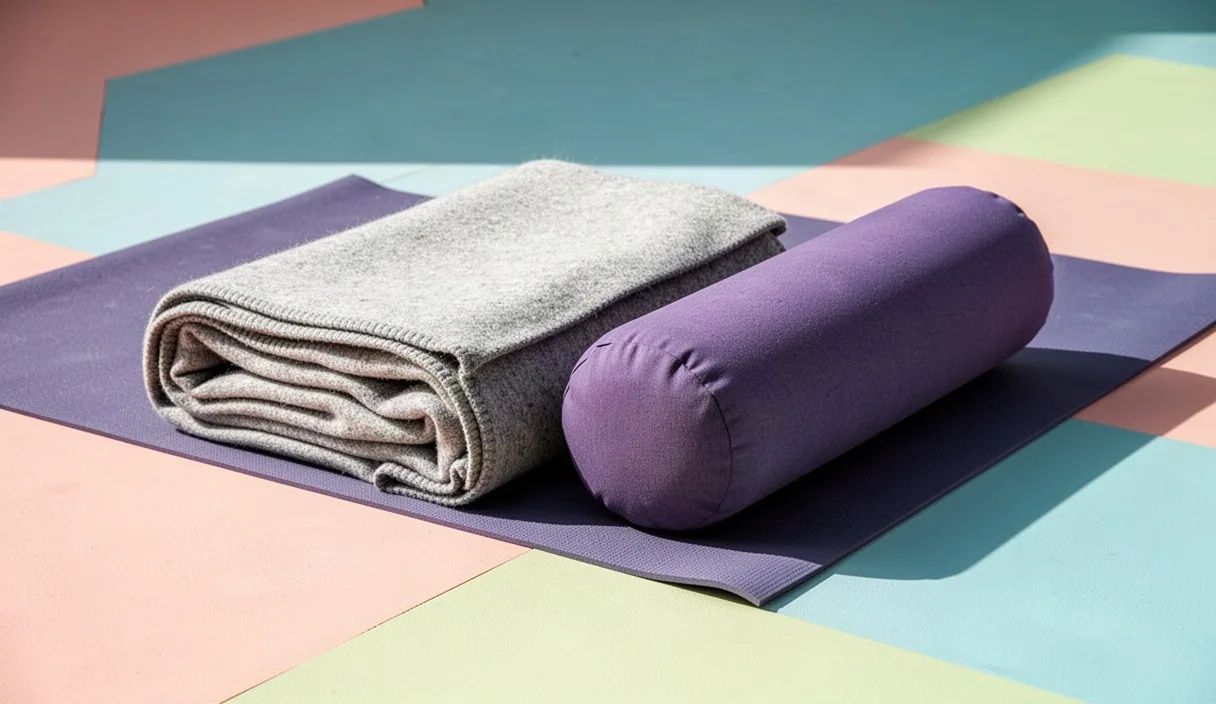

Pigeon pose appears in nearly every modern postural yoga class. Teachers offer it toward the end of class to stretch the outer hip, specifically the gluteus medius, gluteus minimus, and piriformis muscles. In standard Sanskrit sequencing, this shape is the setup for Eka Pada Rajakapotasana. Many practitioners do not feel this stretch in the hip. Instead, they feel a sharp pinch, a burning ache, or a twisting pressure along the inner or outer edge of the front knee joint.
The knee is a hinge joint designed primarily to bend and straighten along one plane. It permits only a few degrees of rotation when bent, and almost none when straight. When you force your pelvis toward the floor while your hip lacks external rotation, the torque transfers straight down the femur into the knee. Modifying the pose removes that torque. The goal of this guide is to explain the mechanics of this joint compensation, show three functional variations using simple props, and help you distinguish between healthy muscular stretch and dangerous ligament strain.
Why the knee joint twists when the hip stops rotating
The hip joint is a ball-and-socket structure. The head of the femur sits inside the acetabulum of the pelvis. This joint moves in three planes: flexion and extension, abduction and adduction, and internal and external rotation. To enter standard Pigeon pose, your front leg requires approximately 45 to 60 degrees of external rotation at the hip socket, combined with deep flexion. If your hip capsule or your deep lateral rotator muscles are stiff, the femur stops turning in the socket before your pelvis meets the floor.
Gravity does not stop pulling your torso down when your hip stops rotating. Because the floor blocks the lower leg from sliding, the pelvis continues to drop. That downward weight turns the tibia into a lever. Instead of the femur rotating within the pelvis, the femur twists across the top of the tibia. This movement creates a shear force across the knee joint capsule.
The knee joint relies on ligaments and fibrocartilage for stability rather than deep bony sockets. The medial collateral ligament (MCL) runs along the inside edge of the knee. The lateral collateral ligament (LCL) runs along the outside edge. Inside the joint sit the medial and lateral menisci, which act as shock absorbers between the femur and tibia. When the hip fails to rotate, the knee joint gapes open on one side and pinches tightly on the other. A pinch on the inner knee often indicates compression of the medial meniscus. Pain along the inner knee line can also signal an overstretched MCL.
A simple anatomical rule governs this pattern: joint rotation should come from the joint built for rotation. When the ball-and-socket joint of the hip runs out of room, the hinge joint below it takes the strain. Modifying the posture reduces the demand on the hip capsule so the knee can stay in neutral alignment.
Supine figure-four: setup and hand grip choices
The supine figure-four, often called eye-of-the-needle pose or reclined pigeon, removes the weight of your torso from the front leg. Your back rests on the floor. Your spine stays neutral, and you control the depth of hip flexion with your arms instead of gravity.
Lie on your back on a firm mat. Bend both knees and place your feet flat on the floor, hip-width apart. Lift your right foot and cross your right ankle over your left thigh, just below the left knee. Do not place the ankle bone directly on top of the thigh bone, as this causes local bruising; place the lower shin or the flat part of the ankle across the muscle. Flex the right foot actively by drawing the toes back toward the right shin. This muscular engagement tightens the muscles around the ankle and stabilizes the lateral collateral ligament of the right knee.
Choose your hand grip based on your arm length and shoulder mobility:
- Hamstring grip: Lift the left foot off the floor. Reach your right arm through the triangle formed by your legs. Reach your left arm around the outside of your left thigh. Clasp your hands behind the left hamstring. Keep your head, neck, and shoulder blades flat on the mat. If your head tilts backward, slide a folded blanket under your skull.
- Shin grip: If your hips have greater mobility and your shoulders remain relaxed on the floor, clasp your hands around the front of the left shin, roughly two inches below the kneecap. Draw the left knee toward your chest while keeping your tailbone pinned to the floor. Do not curl your lower back off the floor to make this reach.
- Strap grip: If your shoulders pull toward your ears or your neck arches when reaching for the leg, loop a standard six-foot cotton yoga strap behind the left hamstring. Hold one end of the strap in each hand. Keep your elbows bent by your ribs and pull on the strap to bring the legs toward your chest.
Check the right knee while holding the shape. The right knee should point outward at an angle away from your chest. If you feel any strain on the inner right knee, push the right heel away from the hip and back off the depth of the pull. Hold the position for 8 to 10 slow breaths, then repeat on the opposite side.
Bolster placement under the pelvis in classic Pigeon
Classic Pigeon pose places the front leg in front of you on the floor and extends the back leg straight behind you. When your front hip hovers several inches off the floor, gravity tilts your pelvis sideways. This tilt twists the front knee. Placing a dense rectangular bolster under the front pelvis fills this void and gives the hip bone a stable platform.
Place a firm yoga bolster horizontally across the middle of your mat. Start on all fours with your hands in front of the bolster and your knees behind it. Slide your right knee forward so that the front surface of your right sitting bone lands directly on top of the bolster. Your right thigh will angle outward at roughly 30 degrees toward the right edge of the mat.
Do not try to force your right shin parallel to the top of the mat. Bring your right heel close to your left groin. An acute angle at the knee joint (heel to pelvis) protects the knee ligaments by locking the joint in flexion. Slide your left leg straight back behind the bolster. The front of your left thigh, left kneecap, and the top of your left foot should press evenly into the floor.
| Prop Setup | Pelvis Angle | Primary Benefit | Best Used For |
|---|---|---|---|
| Horizontal bolster under right hip | Square to the front edge of the mat | Stops downward pelvic tilt | Mild hip stiffness |
| Bolster plus folded wool blanket | Elevated 6 to 8 inches above mat | Decreases required hip flexion | Moderate hip stiffness |
| Block under front hip, block under hands | Elevated and upright torso | Removes torso weight from leg | Tight hip flexors and knees |
Once your right buttock rests firmly on the bolster, check your pelvis. Both hip points (anterior superior iliac spines) should point directly forward, level with the front edge of your mat. If your left hip drops backward and open, your right knee is twisting under your body. Adjust the height of the props by stacking a folded wool blanket on top of the bolster until your pelvis sits level without muscular strain. Keep your hands on the floor or on blocks under your shoulders to support your torso weight.
The 90-90 seated position as a floor alternative
The 90-90 seated position breaks down the hip mobility requirements of Pigeon pose into two distinct, manageable hip angles. It eliminates the backward extension of the rear leg, which often causes practitioners to twist their pelvis out of alignment. It also allows you to place both knees at an exact right angle on the floor.
Sit directly on your mat with your knees bent and feet flat on the floor in front of you. Drop both knees to the right side. Adjust your front right leg so your thigh points straight forward from your hip and your shin forms a 90-degree angle to your thigh. Your right foot is flexed, with the pinky-toe side of the foot resting on the floor.
Adjust your back left leg so your left thigh points directly out to the left, perpendicular to your right thigh. Bend your left knee to a 90-degree angle so your left shin points backward. Your left inner ankle rests against the floor. In this position, your right hip is in 90 degrees of flexion and external rotation, while your left hip is in 90 degrees of flexion and internal rotation.
Sit tall. If your left hip sits high in the air and causes you to lean heavily to the right, place a folded blanket or foam yoga block under your right buttock. This elevation levels the pelvis. Place your fingertips on the floor on either side of your front right knee.
To produce the hip stretch without knee torque, hinge forward from the hips with a flat back. Do not round your upper spine over the leg. Move your sternum forward toward your right shin. Stop as soon as you feel a stretch in the deep right buttock. Because the right knee is held at a strict 90-degree angle and the foot is flexed, the lower leg bones cannot twist against each other. If you feel any discomfort on the lateral edge of the right knee, decrease the angle of the knee by bringing the right heel four inches closer to your pelvis.
Assessing outer hip sensation versus knee joint pressure
Practitioners often confuse tissue tension with structural damage. Safe execution of hip openers requires identifying which anatomical structure is generating the signal. Muscle tissue produces a broad, warm, dull ache across a fleshy area. Tendons produce an ache close to the bony insertion point. Ligaments and cartilage generate sharp, focal, pinching, or electrical sensations directly inside the joint capsule.
When you hold any variation of Pigeon pose, focus your attention on your front leg. You want to feel sensation in the outer buttock, running from the back of the pelvis down toward the greater trochanter (the bony bump on the outer side of your upper thigh). This sensation marks the lengthening of the gluteal muscles and the piriformis. It may feel intense, but it covers a wide area and softens as you maintain steady breathing.
Joint pressure feels entirely different. If you feel a hot point of pain on the inside edge of your knee joint, that is the medial joint line compressing or the MCL stretching. If you feel a sharp pinch on the outside corner of the knee, that is the lateral meniscus or the tendon of the biceps femoris pinching against the fibular head. Sensation should never occur inside the knee joint itself. The knee has no muscular belly to stretch. Any sharp sensation at the joint line is a direct signal to exit the posture immediately.
Use this simple checklist during your practice:
- Target area: Broad, dull stretch across the posterior outer hip and buttock. This is acceptable.
- Warning area: Sharp, localized, or burning sensation along the inner or outer seam of the knee joint. This requires immediate modification.
- Red flag: Numbness, tingling, or needles radiating down the lower leg into the toes. This indicates nerve compression, usually the sciatic or peroneal nerve. Exit the pose completely.
Common mistakes
Small errors in setup quickly turn an effective hip stretch into a knee injury. Watch for these four common alignment faults during your practice.
The first mistake is forcing the front shin parallel to the front edge of the mat. Many yoga classes present a parallel shin as the ultimate expression of Pigeon pose. For most human skeletons, a parallel shin requires nearly 90 degrees of hip external rotation. If your femoral neck or acetabulum does not allow that range of motion, the parallel shin acts as a long lever that wrenches the knee joint open. Keep your front heel pulled in close to your groin unless your hip naturally rests on the floor with no effort.
The second mistake is sickling the front foot. Sickling occurs when the foot curves inward at the ankle, exposing the outer ankle bone to the floor while the sole of the foot turns toward the ceiling. A sickled foot turns off the muscular sling that stabilizes the lateral knee. Keep your ankle straight and flex the foot by pulling your toes toward your shin bone.
The third mistake is letting the pelvis roll toward the front hip. When practitioners cannot get the back hip down, they often collapse entirely onto the front buttock, letting the back leg twist open and rolling the spine into an asymmetrical twist. This collapse removes the stretch from the hip and concentrates twisting force on the lumbar spine and the front knee. If your pelvis does not sit square, place a firm prop under the hip that is dropping.
The fourth mistake is using forward folds to force the posture deeper before the pelvis is stable. Folding the chest down to the mat increases the load on the front leg. If your pelvis is not supported by a prop or the floor, your torso weight drives your femur directly into the twisted knee. Keep your spine upright on hands or blocks until your pelvis is fully supported.
Practical next steps for your practice
Test these modifications systematically rather than guessing during a fast-paced class. Set aside ten minutes on a carpeted floor or yoga mat with a yoga block, a blanket, and a strap.
Begin with the supine figure-four. Hold it for two minutes on each side. Notice where you feel the sensation. If you feel clean muscular engagement in your outer hip without a whisper of knee pressure, this shape is your safe baseline. Use it in class whenever an instructor calls for classic Pigeon pose.
Next, test the 90-90 seated position. Use your hands on the floor to support your weight as you hinge forward. If your knees remain comfortable, integrate this shape into your home practice to build functional hip external rotation without loading the back leg.
Only attempt the bolstered classic Pigeon pose once your knees tolerate the 90-90 seated position without pain. Always set up the bolster under your sitting bone before lowering your pelvis. If you have a diagnosed history of meniscus tears, ligament laxity, or joint mobility in the knee joint, skip the classic prone posture entirely. Consult an orthopedist or a physical therapist to evaluate your passive hip range of motion before loading the hip joint in deep flexion.